Introduction
Craving something irresistibly gooey, rich, and chocolatey? Look no further! A chocolate cobbler recipe delivers the ultimate indulgent dessert with its molten chocolate base and crispy top. It’s a classic Southern treat that’s both comforting and easy to make. Whether you’re preparing it for a family gathering or a simple weeknight treat, this dessert will wow your taste buds. In this article, we’ll guide you through every detail—from the history of this mouthwatering dessert to step-by-step preparation tips, serving suggestions, and even delicious variations. Ready to dive into the world of chocolate perfection? Let’s get started!

Decadent Chocolate Cobbler Recipe: A Classic Southern Delight
Nothing says comfort like a warm serving of chocolate cobbler. This dessert combines the best of a cake and a pudding into one luscious dish. With its velvety chocolate sauce and lightly crisped topping, it’s no wonder this old-fashioned favorite has stood the test of time.
The beauty of this recipe lies in its simplicity. No need for complicated techniques or fancy ingredients—you likely have everything you need right in your pantry! And the best part? You can make this dessert from scratch in under an hour. It’s the perfect way to satisfy your sweet tooth while creating a cozy, memorable experience for everyone at the table.
The following sections will explore the origins of this beloved treat, the essential ingredients, and tips for perfecting it at home. Stay tuned as we take you through the delicious journey of making the best chocolate cobbler recipe ever!
Understanding Chocolate Cobbler Recipe
What is Chocolate Cobbler Recipe?
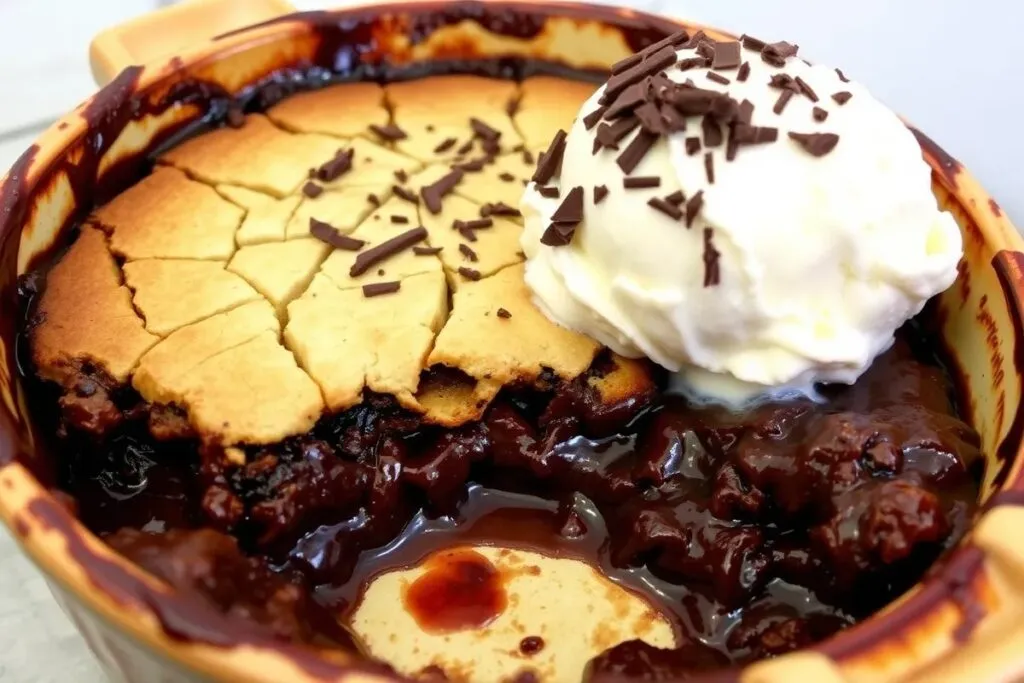
Chocolate cobbler is a decadent dessert that falls somewhere between a cake and a pudding, offering the best of both worlds. Imagine a dessert with a soft, cake-like crust on top and a rich, molten chocolate sauce bubbling underneath—pure heaven in every bite!
When baked, this delightful treat forms two distinct layers: a slightly crispy, golden-brown top that gives way to a thick, gooey chocolate filling. The contrasting textures make every spoonful irresistible. As you break through the crust, a luscious river of chocolate sauce oozes out, enveloping your taste buds with its velvety smoothness.
What’s even more enchanting is how simple it is to prepare. You don’t need complicated techniques or advanced baking skills. Just mix the batter, sprinkle a cocoa-sugar mixture on top, and pour hot water over it. Like magic, the oven does the rest—transforming these basic ingredients into an indulgent, comforting dessert that’s perfect for any occasion.
The History and Origin of Chocolate Cobbler Recipe
The roots of chocolate cobbler trace back to the Southern United States, where hearty, comforting desserts are a cherished culinary tradition. Historically, cobblers were simple, affordable treats created by combining pantry staples like flour, sugar, and cocoa powder—ingredients readily available in most homes.
The term “cobbler” originally referred to fruit-filled desserts with a biscuit or cake topping. Over time, creative Southern bakers adapted the concept, swapping out fruits like peaches and berries for something more indulgent—chocolate. This transformation led to the invention of the chocolate cobbler, a dessert that soon became a staple at church gatherings, potlucks, and family dinners.
An interesting bit of trivia: early versions of the dish were sometimes called “pudding cake” due to its soft, custardy texture. However, the name “chocolate cobbler” stuck, emphasizing its rustic, homemade appeal. Its enduring popularity lies in its simplicity, versatility, and the pure joy it brings with every rich, chocolatey bite.
Today, chocolate cobbler recipes continue to evolve, with home bakers adding unique twists like nuts, marshmallows, or even a splash of espresso. But no matter how it’s made, its comforting flavors and nostalgic charm remain timeless. This dessert has become a true classic—beloved by generations and celebrated for its warm, chocolaty embrace.
Ingredients and Equipment

Essential Ingredients for Chocolate Cobbler Recipe
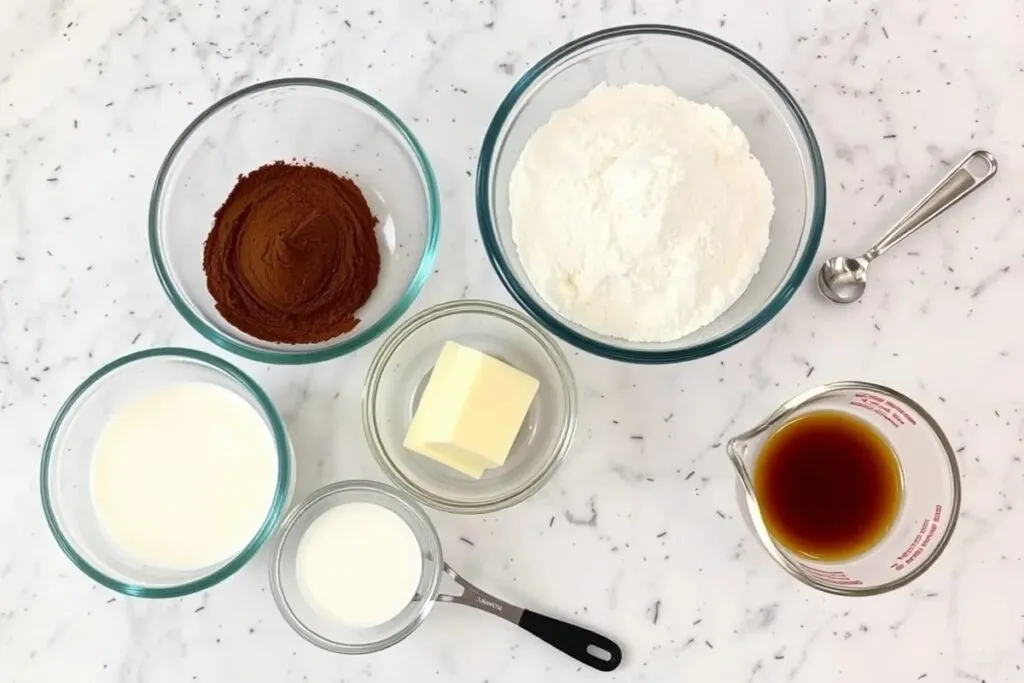
Creating the perfect chocolate cobbler recipe starts with using the right ingredients. Each element plays a crucial role in achieving that signature gooey filling and crispy top. Here’s a breakdown of the key ingredients and tips for selecting the best ones:
- Cocoa Powder: This is the heart of the dessert. Use high-quality cocoa powder for a deep, rich chocolate flavor. Opt for unsweetened varieties to control sweetness.
- All-Purpose Flour: Flour provides structure and helps create the cobbler’s cake-like topping. Make sure to sift it for a smoother batter.
- Granulated Sugar: Sugar sweetens the batter and creates the caramelized crust. A mix of white and brown sugar can add extra depth of flavor.
- Butter: Use real unsalted butter for a rich, creamy taste. Melt it before mixing for better incorporation.
- Milk: Whole milk is ideal for adding moisture and richness. Dairy-free alternatives like almond or oat milk can be used if needed.
- Baking Powder: This leavening agent ensures a light, fluffy topping that contrasts perfectly with the gooey chocolate base.
Pro Tip:
Add a pinch of salt and a dash of vanilla extract to balance the sweetness and enhance the chocolate flavor. These small touches can make a big difference!
Selecting the Best Cocoa Powder
The type of cocoa powder you choose directly affects the cobbler’s taste and appearance. There are two common varieties:
- Natural Cocoa Powder: Light brown in color with a slightly acidic taste, it’s perfect for recipes using baking soda as a leavening agent. Its bold chocolate flavor works well for an intense taste.
- Dutch-Processed Cocoa Powder: This version has been alkalized to reduce acidity, making it darker and milder. It creates a smoother, richer chocolate flavor.
For the best results, consider using a blend of both types for a more complex chocolate profile. If you’re aiming for a deep, dark cobbler, Dutch-processed cocoa is the way to go. Look for well-known brands that list cocoa solids of at least 70% for a truly decadent experience.
Choosing the Right Flour
Flour forms the base of the cobbler’s topping, giving it its characteristic cake-like texture. All-purpose flour is the most versatile choice. It strikes the perfect balance between lightness and structure.
If you have dietary restrictions, consider these gluten-free alternatives:
- Almond Flour: Adds a slightly nutty flavor and extra moisture.
- Coconut Flour: A low-carb option, though it requires more liquid due to its absorbency.
- Gluten-Free All-Purpose Flour Blends: These mixes are formulated to mimic regular flour and work well in most recipes.
Always sift your flour before mixing to prevent lumps and ensure even distribution. This small step can make your cobbler lighter and fluffier.
Necessary Kitchen Equipment
To create a flawless chocolate cobbler, having the right tools is just as important as the ingredients. Here’s what you’ll need:
- Baking Dish: Use a deep, oven-safe dish, preferably ceramic or glass, for even heat distribution. A 9×9-inch dish is perfect for this recipe.
- Mixing Bowls: You’ll need a few sturdy bowls for mixing the batter and dry ingredients separately.
- Measuring Cups and Spoons: Accurate measurements are crucial for baking, so invest in a reliable set.
- Whisk and Wooden Spoon: A whisk ensures lump-free batter, while a wooden spoon is perfect for folding in ingredients.
- Spatula: Use it for scraping down the sides of the mixing bowl to avoid waste.
- Oven Mitts: Protect your hands when handling the hot baking dish.
Pro Tip:
Avoid using metal baking pans, as they can cause uneven browning. Opt for heavy-duty glass or ceramic for the perfect chocolate cobbler texture.
By gathering these ingredients and tools in advance, you’ll set yourself up for a seamless baking experience. Ready to get baking? The next section will take you step by step through the preparation process!
Step-by-Step Preparation

How to Make Chocolate Cobbler: A Step-by-Step Guide
Making chocolate cobbler is simpler than you might think! Follow these easy steps, and you’ll have a delicious, gooey dessert ready in no time. From mixing the batter to baking it to perfection, every step counts toward achieving that irresistible combination of molten chocolate and a lightly crisped topping.
Preparing the Batter
Start by preheating your oven to 350°F (175°C) and greasing a deep baking dish with butter or non-stick spray.
- Mix the Dry Ingredients: In a large mixing bowl, combine 1 cup of all-purpose flour, ¾ cup of granulated sugar, 2 tablespoons of unsweetened cocoa powder, 2 teaspoons of baking powder, and a pinch of salt. Sift the ingredients for a lump-free mixture.
- Blend the Wet Ingredients: In a separate bowl, melt ½ cup of unsalted butter and mix it with ½ cup of whole milk and 1 teaspoon of vanilla extract. Stir until fully combined.
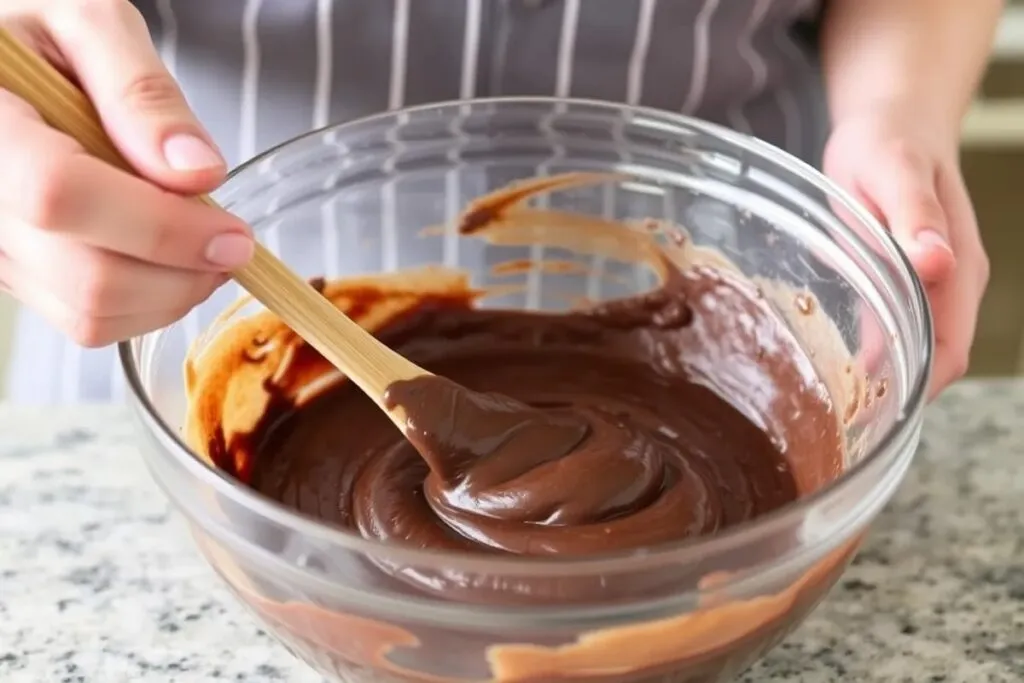
- Combine Wet and Dry Ingredients: Pour the wet mixture into the dry ingredients, stirring gently with a wooden spoon or spatula. Be careful not to overmix; stop once the batter is smooth and thick.
- Spread the Batter: Pour the prepared batter evenly into the greased baking dish, spreading it out with a spatula for even coverage.
Creating the Chocolate Sauce Layer
This is where the magic happens! The chocolate cobbler creates its own sauce while baking, thanks to this clever layering technique:
- Make the Topping Mixture: In a small bowl, combine ½ cup of granulated sugar, ½ cup of brown sugar, and ¼ cup of cocoa powder. Mix well.
- Sprinkle the Mixture: Evenly sprinkle this dry mixture over the batter in the baking dish. It may seem like a lot, but trust the process—this forms the rich, gooey chocolate sauce.
- Add Hot Water: Carefully pour 1 ½ cups of hot water over the entire dish. Do not stir! The water helps dissolve the sugars and activates the cocoa powder, creating that signature molten layer.
Baking to Perfection
Place the baking dish on the middle oven rack and bake for 35 to 40 minutes. The cobbler is ready when the top looks set and slightly cracked, while the edges appear bubbly.
To check doneness, insert a toothpick into the center of the crust—it should come out mostly clean, but the base will remain gooey. Allow the cobbler to cool for 10 minutes before serving to let the layers set. Enjoy its warm, chocolatey goodness!
Serving Suggestions
Serving Chocolate Cobbler Recipe
Chocolate cobbler is best served warm, straight from the oven, allowing its gooey center and crispy topping to shine. This dessert pairs beautifully with a variety of toppings that enhance its rich, chocolatey flavor while adding contrasting textures and temperatures.
For an indulgent treat, serve it in a deep dessert bowl to hold all the molten chocolate sauce. Scoop generous portions and let the toppings melt into the warm dessert for a decadent experience. Whether you’re hosting a dinner party or treating yourself to a cozy night in, this dessert guarantees sweet satisfaction.
Pairing with Ice Cream and Whipped Cream
Nothing elevates chocolate cobbler quite like a scoop of cold vanilla ice cream. The creamy, slightly sweet ice cream balances the cobbler’s deep chocolate flavor while providing a delightful contrast in temperature.
For a lighter option, top it with freshly whipped cream. A dollop of lightly sweetened cream softens the dessert’s richness, making each bite smooth and luxurious. Want extra flair? Use flavored ice creams like salted caramel, coffee, or even cookies-and-cream for a unique twist.
Garnishing Ideas
Add a personalized touch with fun and flavorful garnishes:
- Chopped Nuts: Sprinkle toasted pecans, almonds, or hazelnuts for a satisfying crunch.
- Chocolate Shavings: Grate dark or milk chocolate on top for added decadence.
- Caramel Sauce or Chocolate Drizzle: Drizzle warm caramel or chocolate syrup for extra sweetness.
- Fresh Berries: Add a pop of freshness with raspberries or strawberries for a sweet-tart contrast.
These finishing touches will make your chocolate cobbler look as impressive as it tastes!
Variations and Dietary Considerations
Chocolate Cobbler Variations
One of the best things about chocolate cobbler is its adaptability. Whether you’re catering to dietary restrictions or just looking for creative twists, this dessert is incredibly versatile. From gluten-free versions to vegan-friendly options and even keto-friendly tweaks, there’s a variation for everyone. Let’s explore some delicious alternatives that maintain the same indulgent, gooey texture and rich chocolate flavor.
Gluten-Free Chocolate Cobbler
For a gluten-free chocolate cobbler, swap out traditional all-purpose flour with gluten-free alternatives. Almond flour is an excellent choice, adding a subtle nutty flavor while keeping the dessert moist. Coconut flour also works well but absorbs more liquid, so adjust the wet ingredients accordingly.
Use a store-bought gluten-free flour blend for convenience, ensuring it contains a binding agent like xanthan gum. Make sure to double-check that all other ingredients, especially cocoa powder and baking powder, are certified gluten-free for a truly safe treat.
Vegan Chocolate Cobbler
Creating a vegan-friendly version is simple with a few smart swaps:
- Plant-Based Milk: Use almond, soy, or oat milk for a creamy texture.
- Vegan Butter or Coconut Oil: Replace regular butter with a dairy-free alternative or coconut oil for richness.
- Egg Substitutes: While eggs aren’t needed in traditional chocolate cobbler, if required for binding, try flaxseed or chia seed mixed with water.
These substitutions maintain the dessert’s classic taste and texture while making it fully plant-based.
Sugar-Free or Keto-Friendly Option
Health-conscious bakers can create a low-carb chocolate cobbler by:
- Sweeteners: Use sugar alternatives like erythritol, monk fruit sweetener, or stevia.
- Low-Carb Flours: Replace flour with almond or coconut flour to cut carbs while retaining a moist, rich texture.
By using unsweetened cocoa powder and reducing sugary toppings, you can create a keto-friendly version that satisfies chocolate cravings without the guilt. Enjoy a healthier twist on this timeless dessert!
FAQs About Chocolate Cobbler Recipe
Here are answers to the most common questions about chocolate cobbler. Whether you’re new to baking or troubleshooting issues, these tips will help you master this delicious dessert.
Q1: What Makes Chocolate Cobbler Different from Brownies?
The key difference lies in the texture and consistency. Chocolate cobbler is a two-layer dessert: the top is cake-like with a slightly crisp crust, while the bottom is gooey and saucy. On the other hand, brownies have a dense, chewy, and uniform texture throughout.
In terms of preparation, cobbler involves pouring hot water over the batter, creating a self-saucing chocolate layer underneath as it bakes—something brownies don’t require. This unique baking method sets chocolate cobbler apart from its firmer, more structured counterpart.
Q2: Can I Use a Different Type of Chocolate?
Absolutely! While traditional recipes use unsweetened cocoa powder, you can experiment with:
- Dark Chocolate Chips: For extra richness and a slightly bitter contrast.
- Baking Chocolate: Melt some semi-sweet or bittersweet baking chocolate for an intense chocolate flavor.
- Milk Chocolate Chips: If you prefer a sweeter dessert, these work well but may reduce the dessert’s deep chocolate taste.
Mixing different types of chocolate can create a complex, layered flavor profile.
Q3: How Do I Store Leftover Chocolate Cobbler?
Chocolate cobbler is best enjoyed fresh but can be stored:
- Refrigerator: Transfer leftovers to an airtight container and refrigerate for up to 4 days. Reheat in the oven at 300°F (150°C) for 10-15 minutes or in the microwave for 30 seconds.
- Freezer: Freeze portions in a sealed container for up to 3 months. Thaw in the refrigerator overnight before reheating.
Q4: Why Is My Cobbler Too Runny or Dry?
A runny cobbler often results from:
- Underbaking: Ensure the cobbler bakes for at least 35-40 minutes until the top is firm and cracked.
- Incorrect Measurements: Too much water can cause a soupy consistency. Measure carefully!
A dry cobbler may be caused by:
- Overbaking: Take the cobbler out as soon as the top is set and the edges bubble.
- Too Little Liquid: Ensure you pour enough hot water to create the sauce layer.
